DIY: How to turn a Light Bulb on using Raspberry Pi and Google Assistant
This is a step by step guide on How to use Google Assistant to turn a Light Bulb. I will go with the assumptions that you know how to setup the raspberry pi with NOOBS operating system, and run the update and upgrade to finalize the setup. I hope you have some basic knowledge of python or any programming language to understand the code part this project. We are working with high voltages and proper care must be taken while making the connections and working on the project.
Items Required
- Raspberry Pi 3 Model B
- Relay
- Jumper Wires (female to female)
- A light bulb connected to two wires and a plug
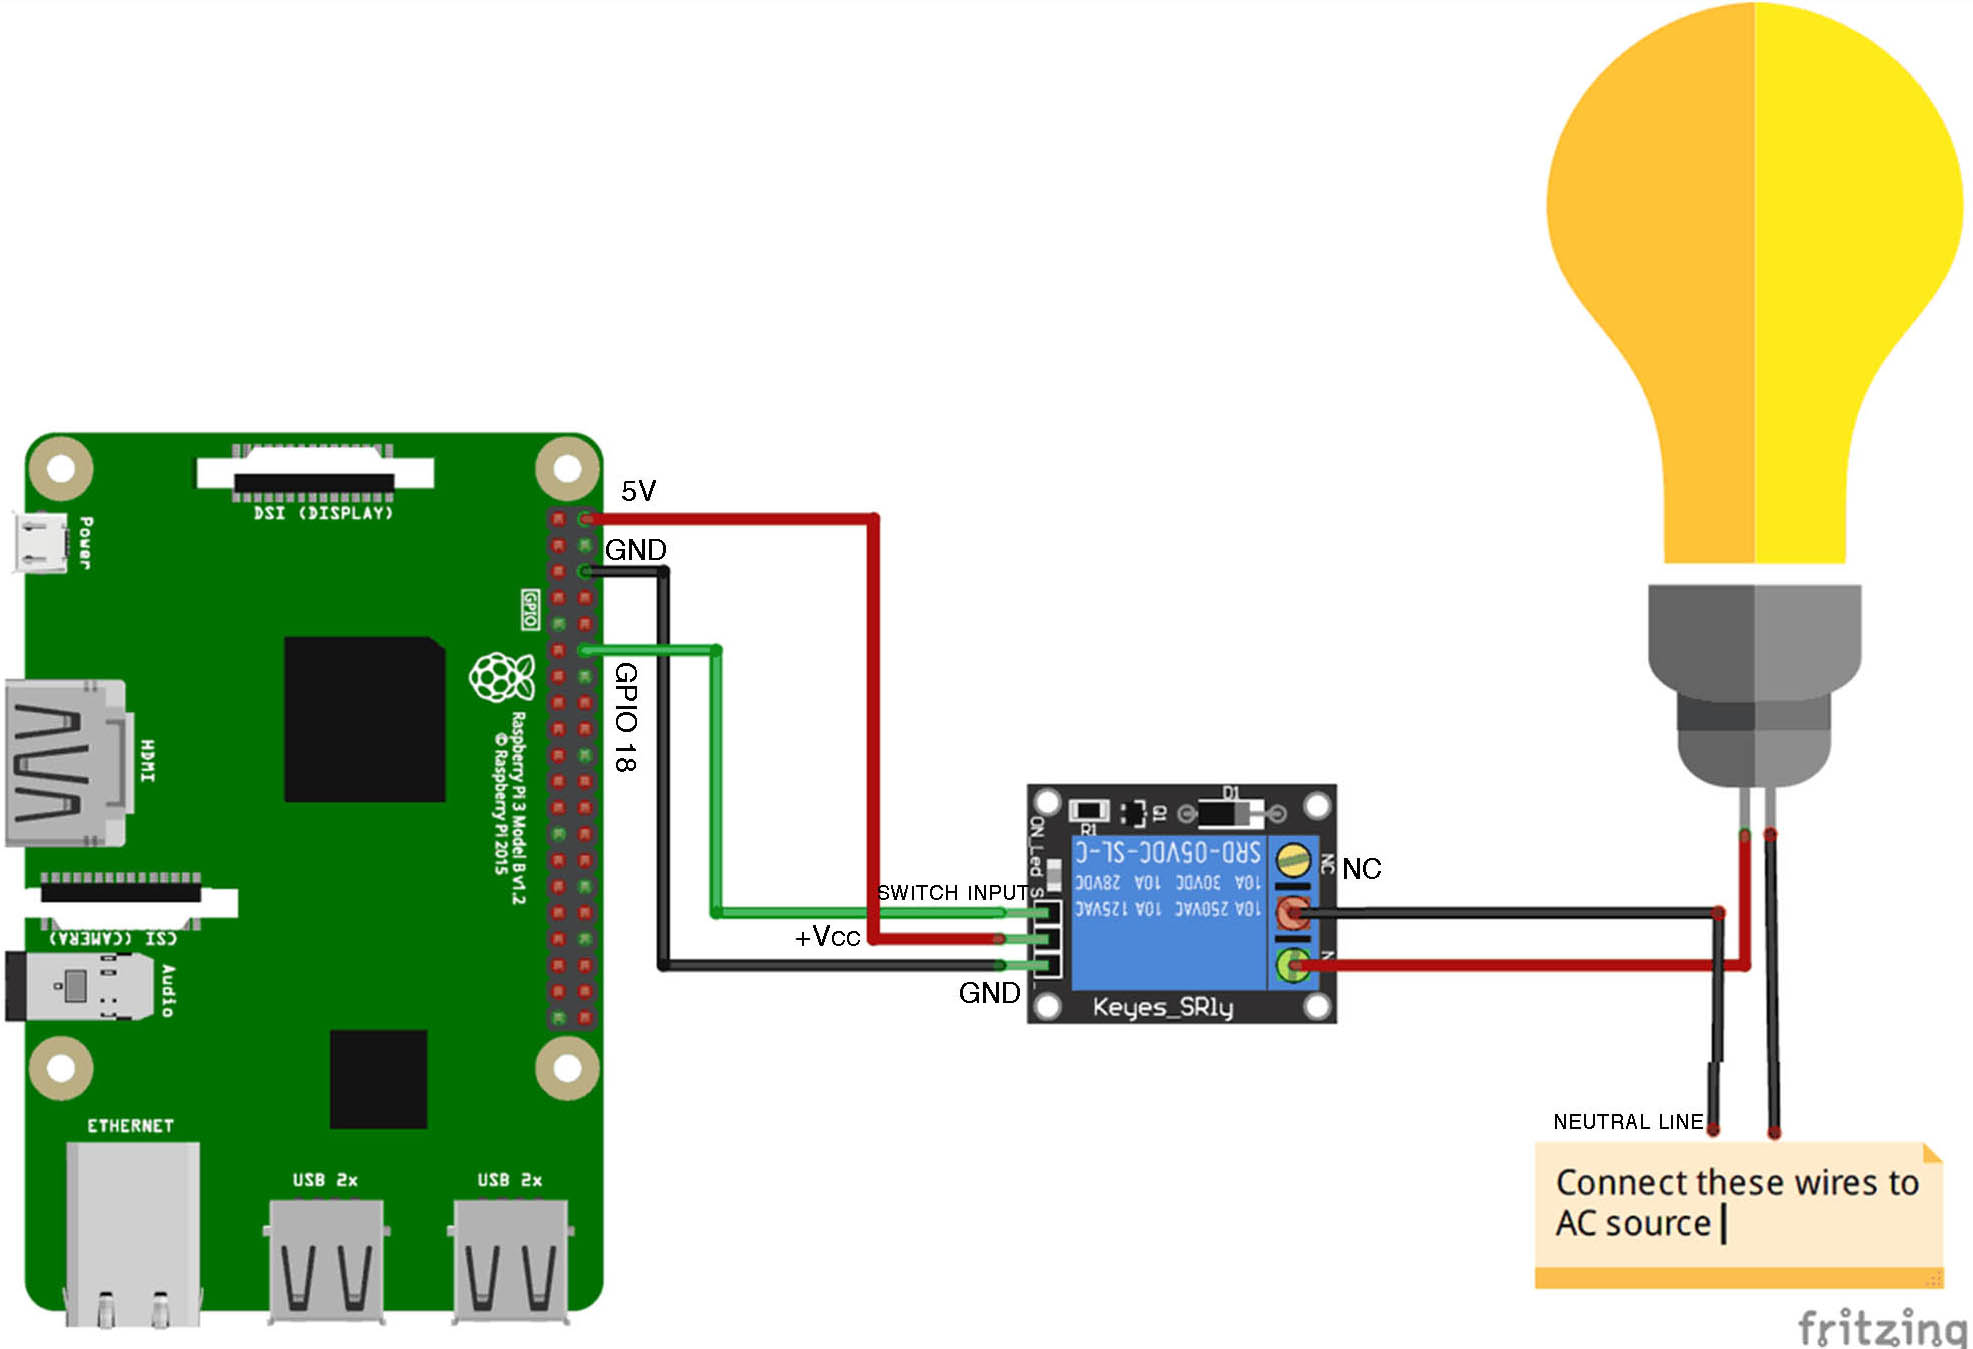
Making the circuit connections as shown in the diagram
- Connect Pin 2 on the raspberry pi to the +Vcc on the relay, this is used to drive the relay.
- Connect any ground pin on the raspberry pi to the ground pin on the relay. I have chosen pin 6
- Then connect the GPIO pin 12 to input of the relay.
- Connect two insulated copper wires, to the center and either of the inputs in the relay and screw them tightly.
- Connect one end to the bulb and the other to plug. Make sure you make the connections on the neutral line.
Make sure all the connections are made properly and power your Raspberry Pi on and run the following script to check if everything works fine.
import RPi.GPIO as GPIO
import time

GPIO.setmode(GPIO.BCM)
GPIO.setup(18,GPIO.OUT)

def switch_on():
    GPIO.output(18, False)

def switch_off():
    GPIO.output(18, True)

print("Turning bulb on")
switch_on()
time.sleep(3)
print("Turning bulb off")
switch_off()
Keep in mind the True and False inputs in switch_on and switch_off functions may have to interchanged based on the wire connections made on the relay, run the script, check and set it accordingly.
Now you are able to turn the light bulb on and off using the python script. To be able to control it using Google assistant, we will use Adafruit IO and IFTTT and configure it to work.
-
Setting up Adafruit Account
- https://io.adafruit.com visit the following link and create an account and login.
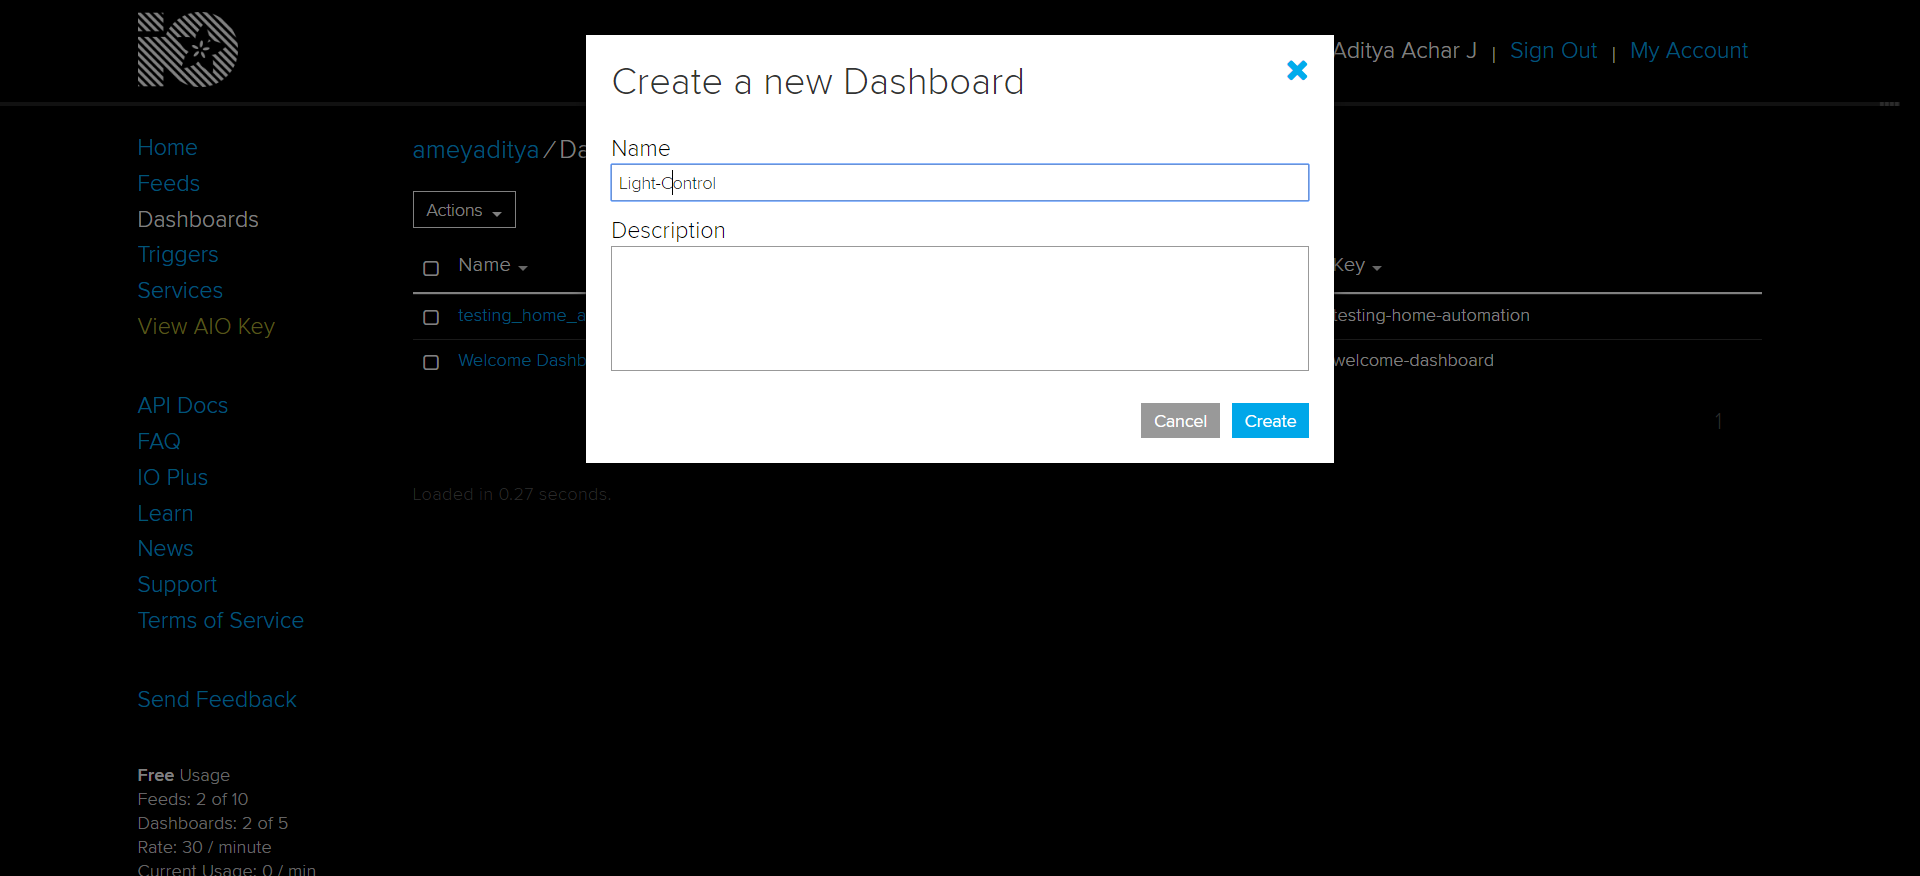
- Create a new Dashboard by clicking on Actions->Create a new Dashboard.
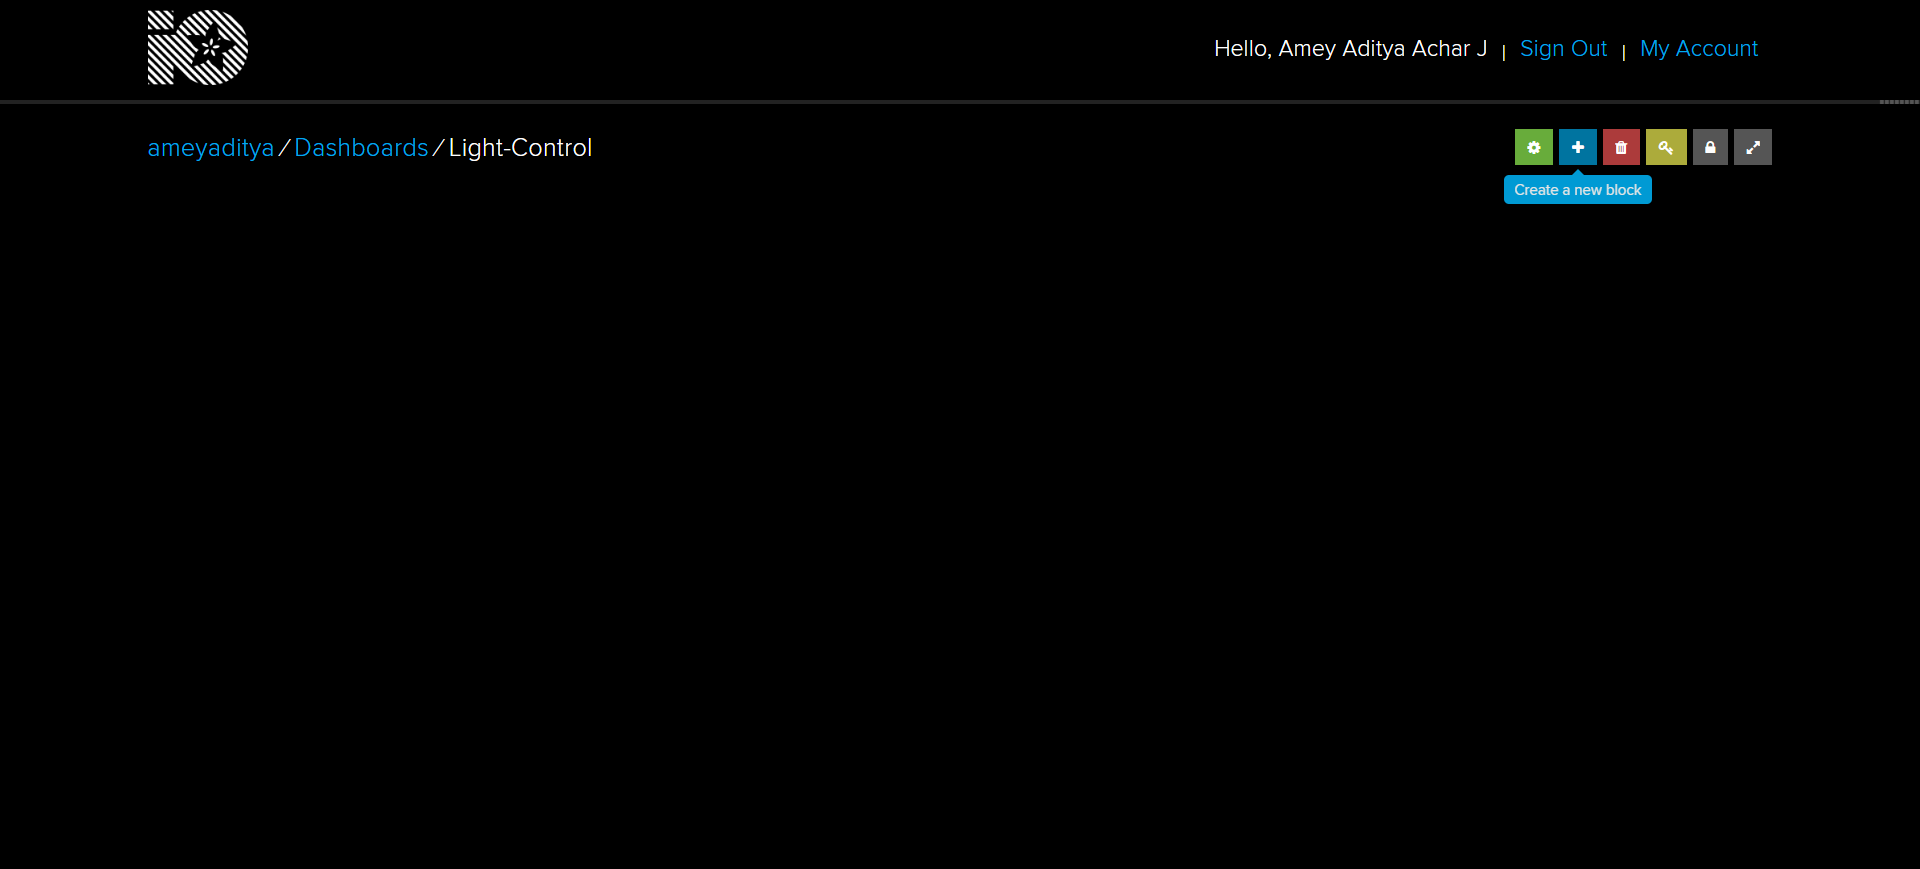
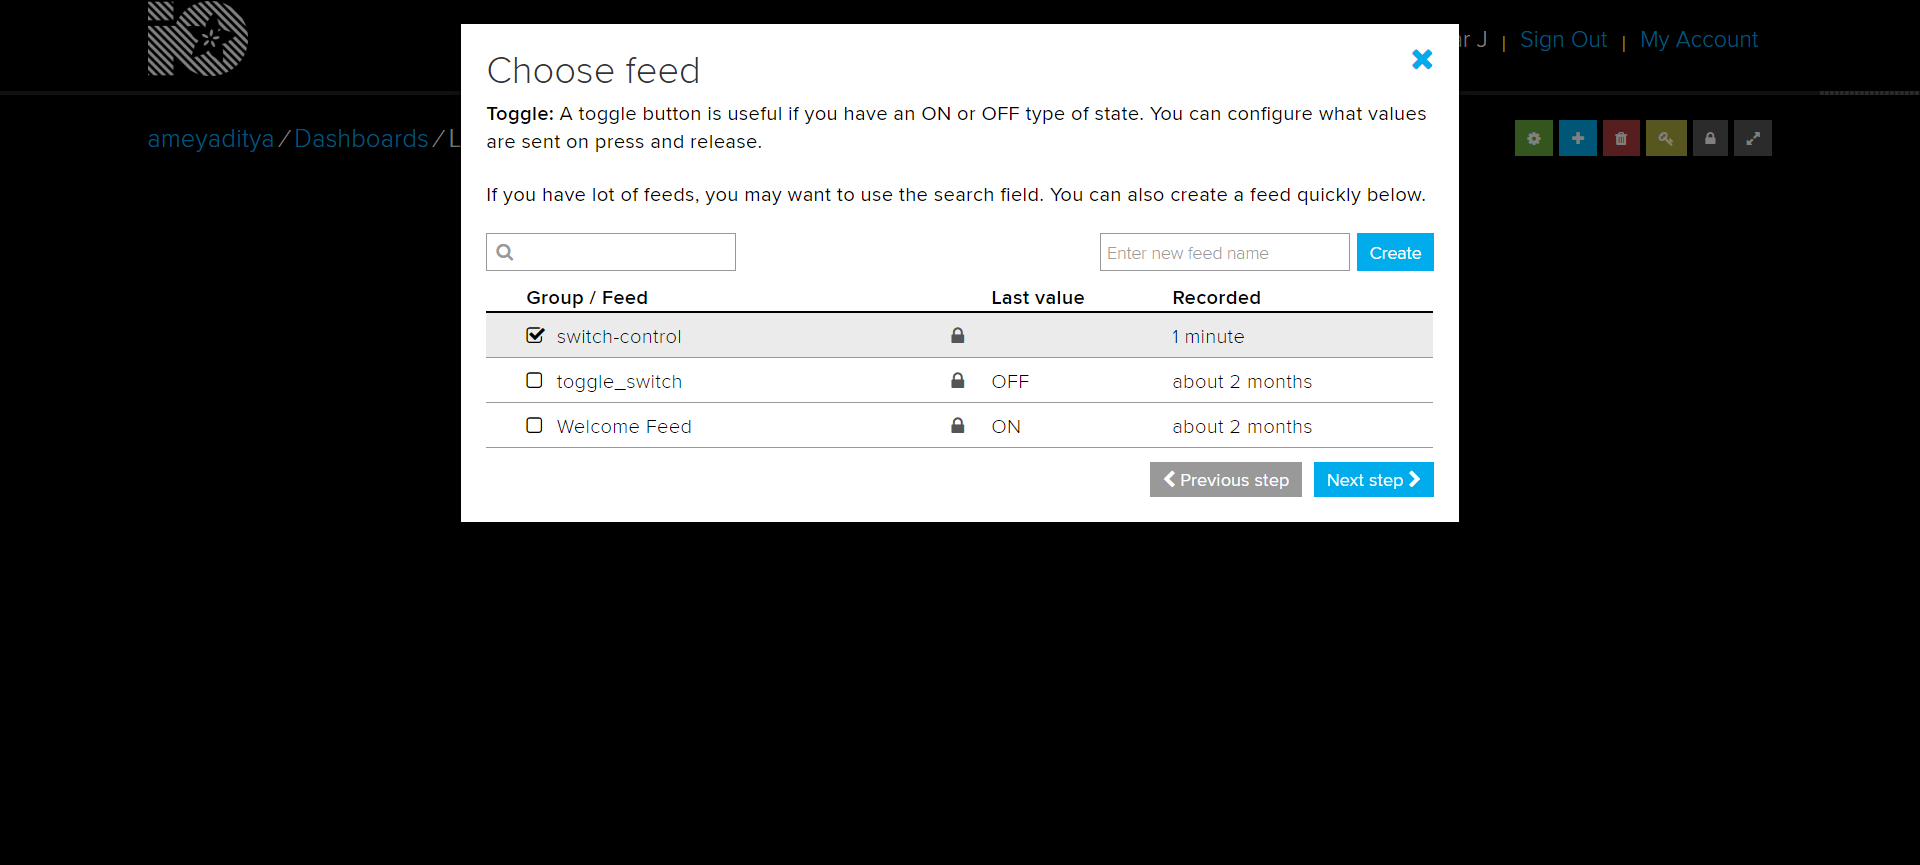
- Enter your newly created Dashboard and click on the Create a new block icon (plus icon).
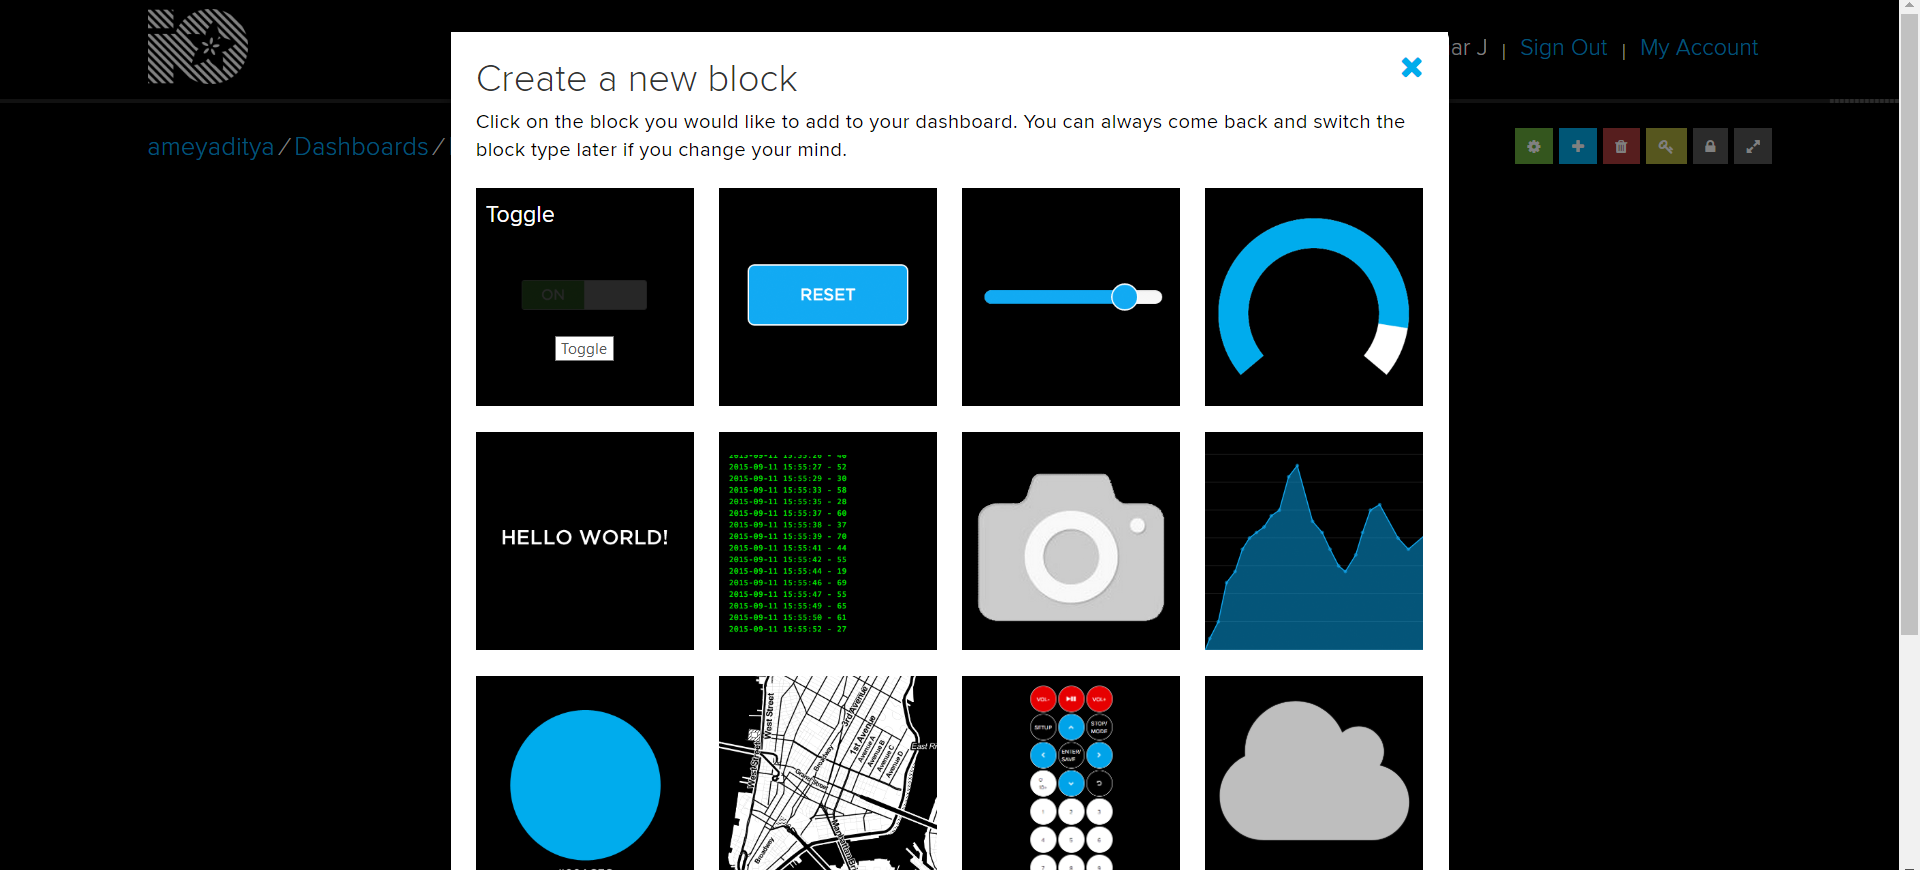
- Select the Toggle icon.
- Create a new feed called ‘switch-control’ and check the box next to it and click next step.
- Give the block a title (switch) and click create block.
- On the top right you will find a key icon that says ‘your secret AIO key’, click on it and copy the username and active key, you will need it later to replace in the python script.
-
Setting up IFTTT
- https://ifttt.com visit the following website and create an account and login
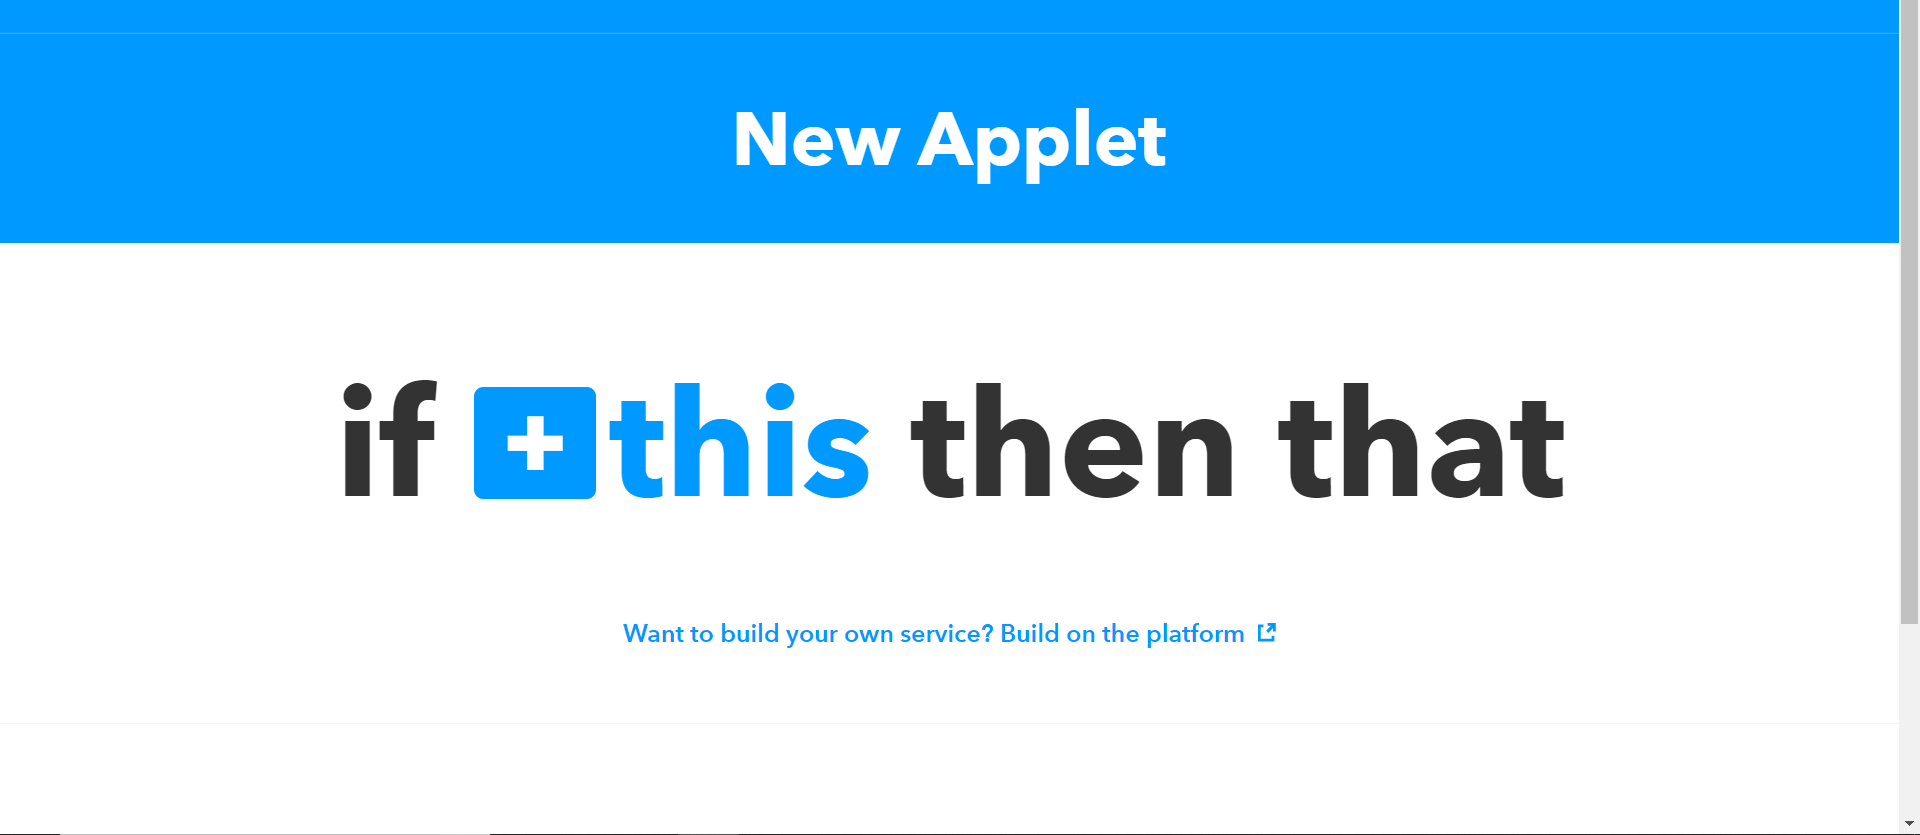
- On login, click on My Applets->New Applet.
- Click on the plus icon next to 'this' and search for Google Assistant and select it.
- Connect the assistant with your Gmail account. (This account should also be registered on the phone that is used to control the switch).
- Select ‘say a simple phrase’ and fill in the phrases you would want to tell the assistant to turn the light on (‘Turn light on’, ‘light on’). You can add multiple phrases. Add a response, that the assistant will give once it has executed the task at hand (‘light turned on’) and click on create trigger.
- Now click on the plus icon next to ‘that’ and search for Adafruit and select it.
- Connect it you the Adafruit account you had created earlier.
- Select ‘send data to Adafruit IO’ and select ‘switch-control’ under the Feed name and ‘ON’ under Data to save and click create.
- Repeat the steps and create an applet to turn light off. In step 4 change phrase to (‘Turn light off’, ‘lights off’) and response to (‘light turned off’). And in step 7, change Data to save to ‘OFF’ and create.
Open terminal on your raspberry pi and run the following commandpip3 install adafruit-io
Save and run the following script on your raspberry pi. Make sure you replace the username and AIO key in the below script.
import RPi.GPIO as GPIO
from Adafruit_IO import Client
import time

ADAFRUIT_IO_USERNAME = "your username"
ADAFRUIT_IO_KEY = "your secret AIO key"

GPIO.setmode(GPIO.BCM)
GPIO.setup(18,GPIO.OUT)

def switch_on():
    GPIO.output(18, False)
    print("turning light on")

def switch_off():
    GPIO.output(18, True)
    print("turning light off")

aio = Client(ADAFRUIT_IO_USERNAME, ADAFRUIT_IO_KEY)

while True:
    data = aio.receive('switch-control')
    if data.value == 'ON':
        switch_on()
    elif data.value == 'OFF':
        switch_off()
    time.sleep(1)
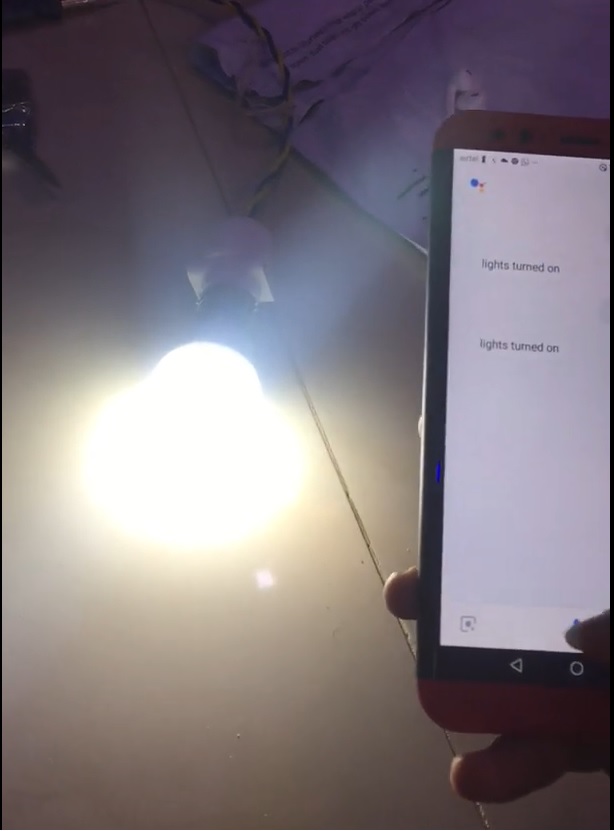
Now run Google assistant on your phone and give it the command to turn lights on or off. The script is running in an infinite loop, you must keep the script running if you want to control the bulb using Google assistant, once done, press ctrl+C to terminate the script.
Screenshots to help you


